| 15.5. Master template for export scenario to PowerPoint | ||
|---|---|---|
 | Chapter 15. Debrief maintainer's guide |  |
In Summer 2018 the ability to export an engagement/scenario to MS PowerPoint was introduced. In the past analysis had captured engagement to video, then included this video in a presentation. Hey, in the far distant past export video was a capability build into Debrief - though it as dropped since Debrief wasn't able to compress the videos, and they were huge.
The new strategy involves capturing the screen coordinates of scenario participants while Debrief is playing through an engagement, then injecting them as an animation into a specially formatted donor PowerPoint file.
This section will introduce the donor template file, and how to collate/maintain it.
The donor file includes the following elements (named as specified), used as in the image below it:
Designated elements in template file
Frame into which the chart is plotted. (Rectangle shape named map)
Marker to indicate current platform location (with platform name). (Callout named marker)
Marker that is used to build up historic platform track. (Line named track.)
List of visible narrative/diary events, populated as time progresses. (Line named narrative.)
Current scenario time. (Text element named time.)
Footprint to indicate the steps of the past plataform's positions. (Object named footprint)
Text value that indicates that distance. (Object named ScaleValue)
This will consist of a rectangle, with width sized according to a particular distance. (Object named ScaleBar)
Figure 15.2. Elements of master template
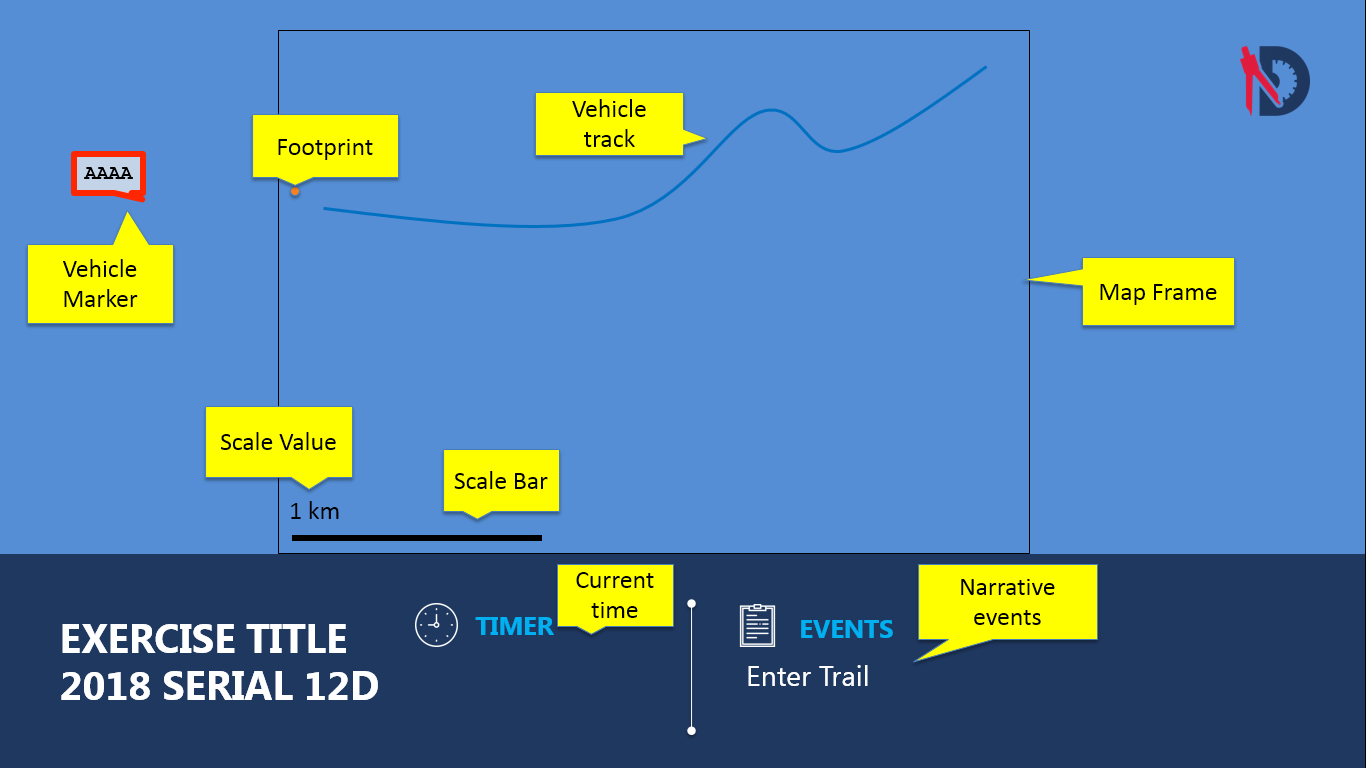
The use of this template allows an analyst's parent organisation to design a template that includes corporate branding, in order that the animated engagement tidily integrates into an outer presentation.
A pptx file is actually a renamed zip archive. The archive contains a series of folders/files, of which we are interested in two:
Figure 15.3. PowerPoint folder structure
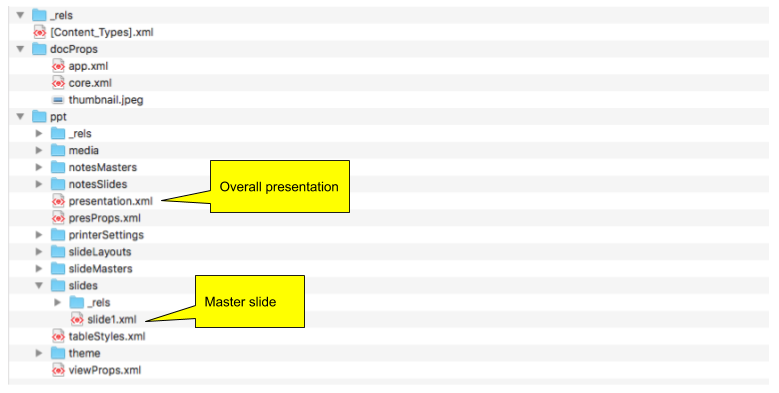
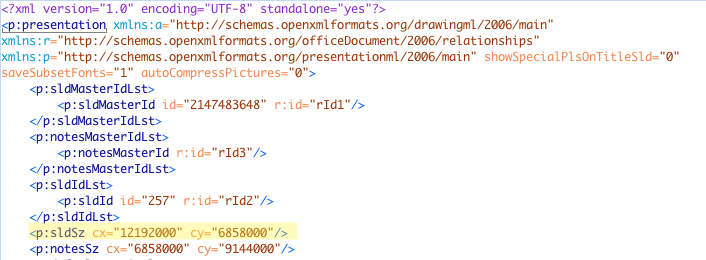
This document contains metadata relating to the whole presentation, including the slide dimensions. The slide dimensions are signficant since some element positioning is performed relative to the size of the slide
This is the document that represents the specific slide that we're writing into, and it contains the named elements detailed above in Designated elements in template file
Significant elements in the master slide are denoted using their name attribute:
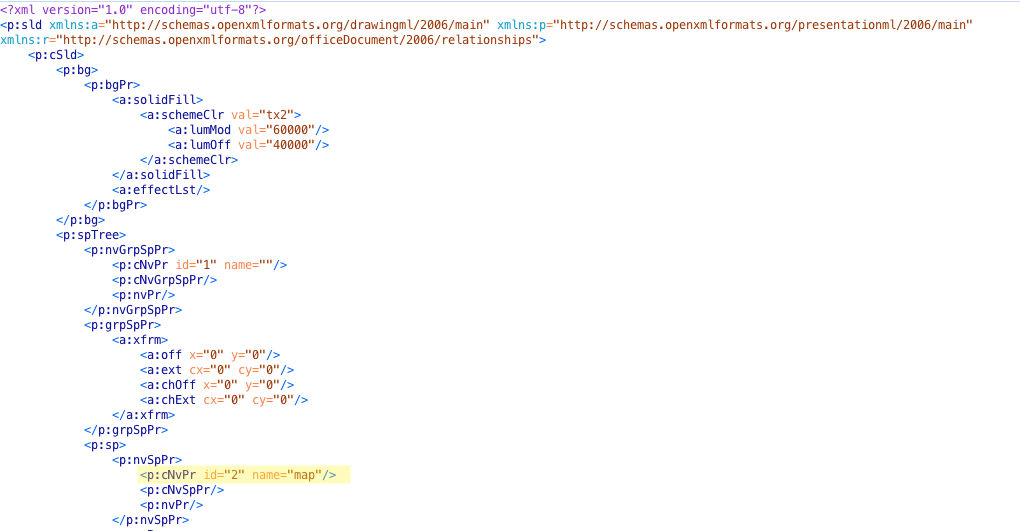
The donor file is built using the following process:
Create a one-slide presentation that contains the elements described in the earlier table
Rename the .pptx file to .zip
Expand the zip-file into a new folder (probably via right-click)
Navigat to the slide1.xml file, located in the folder as detailed above in Section 15.5.2, “Folder structure”
Work through each required element, naming the relevant xml element using the ids listed earlier. Finding the relevant elements in the XML file can be made easier by inserting recognisable blocks (Trumpton) of text into the element using PowerPoint, then looking for that text in the XML editor.
Re-package the folder into a zip-file
Rename the .zip file back to .pptx
One the master slide has been produced, use Debrief preferences to indicate its location:
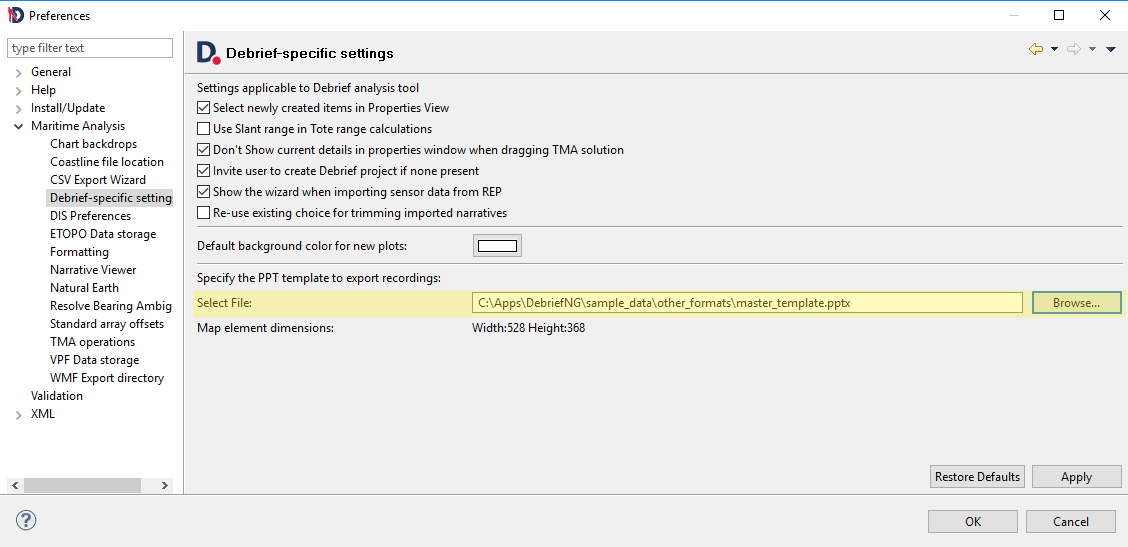
Note the Map element dimensions attribute in the above screenshot. Once a master template has been specified, the map element dimensions are retrieved. This is to allow the analyst to size the Debrief plot to the same dimensions, which will ensure the highest quality animated export - since the Debrief Plot and the target rectangular frame will be of identical proportions.