| 1.4. Start Debrief | ||
|---|---|---|
 | Chapter 1. First steps |  |
| 1.4. Start Debrief | ||
|---|---|---|
| | Chapter 1. First steps | |
Open the application by double-clicking on the executable in your Debrief folder. It may take a couple of seconds to load, but don't worry about this as, once the windows are open, Debrief runs quite quickly. If you are viewing this tutorial online, arrange this window and the Debrief window as best you can, so that both are visible (although you may need to let them overlap if you have limited screen space).
Figure 1.1. Debrief's Welcome view
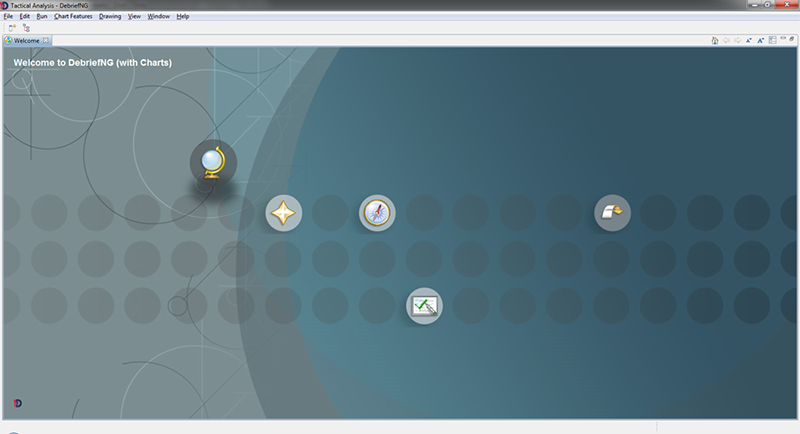
When Debrief is opened for the very first time you will see the Welcome page (shown above). This page includes a series of links to high-level introductory information. Though we do have a quick summary of each below, we do recommend that you go through each of these links and familiarise yourself with what's there.
The Overview page contains guidance for new-adopters of Debrief, whereas the Tutorials page leads users through more specific tasks through the use of tutorials - small pages breaking a task down into a series of steps. The buttons at the top-left of each page navigate you around the welcome guidance. On the Tutorials page one tutorial in particular will help new Debrief-adopters.
It's a good idea to let Debrief itself lead you through your first session
Starting any of the tutorials will shrink the Welcome guidance to a smaller pane exposing the rest of Debrief NG as shown in the following diagram.
Figure 1.2. Debrief's default view
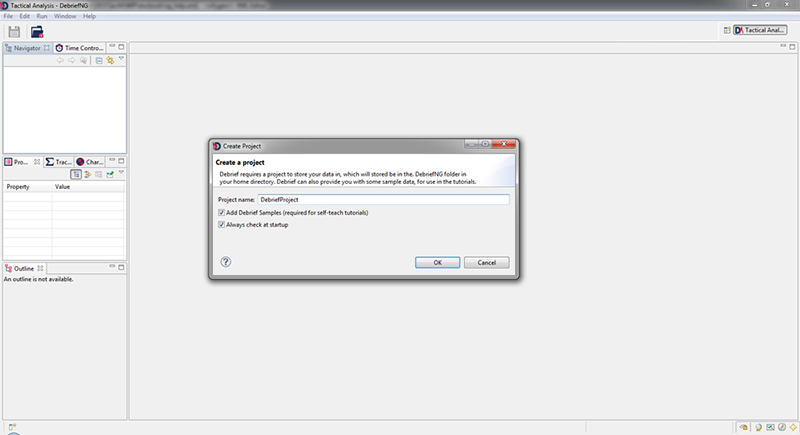
Debrief requires you to have a working folder to store your data in (a project). As a convenience, when you open Debrief it will check if there are any projects present. If none are present, the Debrief New Project Wizard will invite you to create a project folder. Debrief will also offer to copy in some sample data - it's a good idea to do this.
The Debrief user-interface follows the Workbench convention, whereby a users edits individual files in an Editor assisted by a series of supporting information panes called Views. The specific arrangement of editors and views offered by Default is called a Perspective - in this opening instance it will be the Tactical Analysis perspective.
Though views can either be dragged to any other location on the workbench or floated above the workbench, the Tactical Analysis perspective arranges the views into sets of grouped tabs. Views frequently have their own toolbar and drop-down menu which provides actions related to that particular task.
Once selected, views are closed by clicking on the white diagonally-oriented cross. To re-open a view or open a fresh view select from the menu; a list of Debrief-related views will then be shown. Other views can be selected from the menu item.
Fundamentally, the Debrief user interface (generically termed the Workbench) is constructed from a plot editor, surrounded by a series of support panes (called views), both underpinned by a main menu and a series of toolbars. These elements are described further below.
Figure 1.3. A Debrief plot
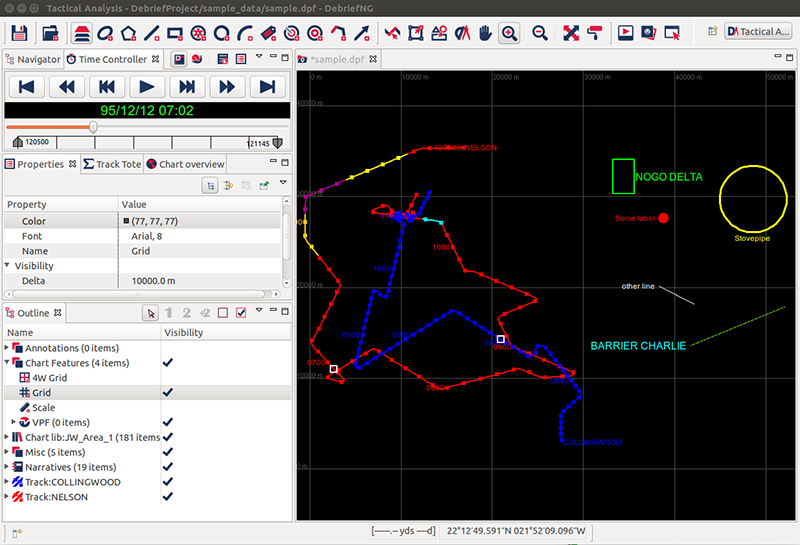
Any number of editors can be open at once but, as is common with many applications, only one can be active at a time. The main menu bar and toolbar for Debrief contain operations that are applicable to the active editor. Initially the active editor will always be the Debrief plot, but the extensibility of Debrief NG means other types of editor can be implemented. Tabs at the top of the editor area indicate the names of files that are currently open for editing (Sample.dpf in the previous screenshot). An asterisk (*) in the tab indicates that an editor has unsaved changes. By default, editors are stacked in the editor area, but you can easily tile them by dragging and dropping the tabbed plot-name to another location in the window; this allows you to view source files simultaneously.
Views support editors and provide alternative presentations as well as ways to navigate the information in your Workbench. For example, the Navigator displays projects and other resources that you are working with (see Section 1.4.3, “Navigating around Debrief”), and the Outline View shows a list of selectable items within the current plot (see Section 3.4, “Layer management”).
Views also have their own drop-down menus. To open the menu for a view, click the icon at the right end of the view's title bar. Some views also have their own toolbars. The actions represented by buttons on view toolbars only affect the items within that view.
A view might appear by itself, or stacked with other views in a tabbed notebook. You can change the layout of a perspective by opening and closing views as well as by docking them in different positions in the Workbench window. We've attempted to provide a logical arrangement of Debrief views, but feel free to experiment. Debrief will remember your settings, but if at any point you wish to return to the presets select from the menu.
There are four kinds of toolbars in Debrief.
The main toolbar, sometimes called the Workbench toolbar, is displayed at the top of the Workbench window directly beneath the menu bar. Items in the toolbar might be enabled or disabled based on the state of either the active view or editor. Sections of the main toolbar can be rearranged by dragging and droppign with the mouse.
There are also individual view toolbars, these appear in the title bar of a view. It's important to note that actions in a view's toolbar apply only to the view in which they appear. Some view toolbars also include a Menu button, shown as an inverted triangle, that contain actions for that view.
Whilst Debrief doesn't currently make use of Perspectives (refer to the Perspectives note, below), a third type of toolbar is the perspective switcher. The perspective switcher allows quick access to perspectives that are currently open. It also has a button that can open new perspectives. The perspective switcher is normally located in the top-right, next to the main toolbar. However, it is also possible to position it below the main toolbar ("top-left"), or to position it vertically on the left-hand side of the workbench ("left"). The name of the perspective is shown by default, but it is possible to hide the text and show only the icons. To reposition the perspective or hide the text, right-click on it and choose the appropriate item from the context menu. When Debrief contains modules for Track Reconstruction it would be understandable for a Track Reconstruction perspective to provide a suitably tailored set of views.
Finally, the fast view bar is a toolbar that contains icons representing the current set of fast views. A fast view is a shortcut to a view that is frequently used; it is generated by right-clicking in a view's title bar. The fast view bar appears in the bottom left corner of the workbench by default. However, it is possible to position it on the left or right as well. In all cases, you can find out what toolbar buttons do by moving your mouse pointer over the button and reading the tooltip that opens.
Refer to the Debrief tutorials (Tutorials) for guidance in creating either a new Debrief plot, or in loading an existing plot.
| |  | |
| 1.3. Configuring reference data |  | 1.5. Importing track data |
![[Note]](images/note.gif)